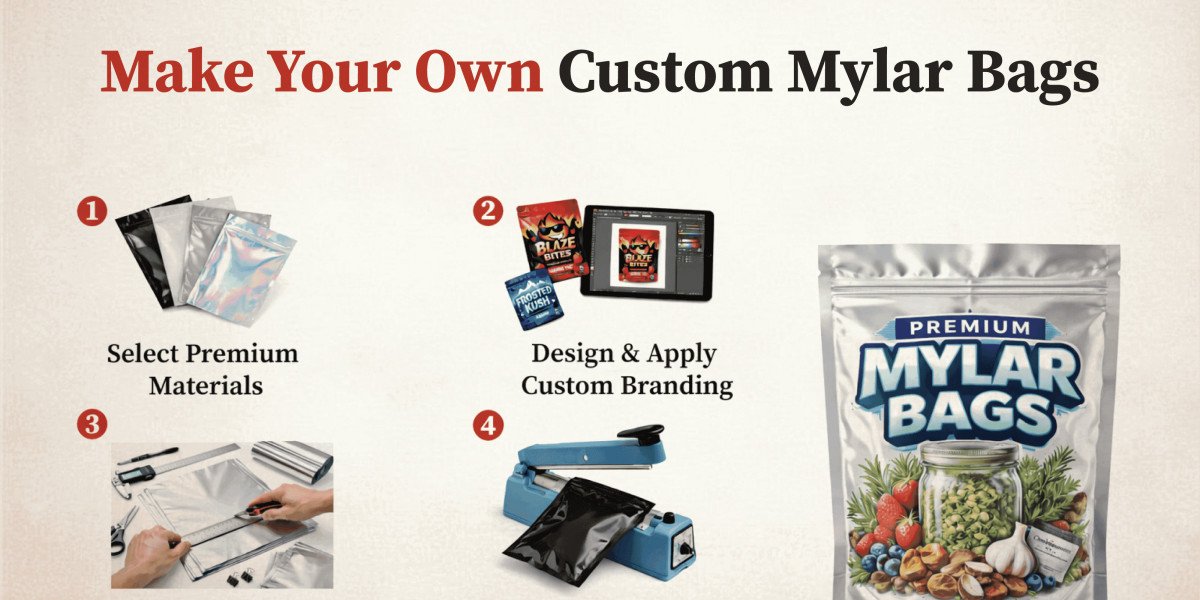
By knowing the answer of how to make your own custom Mylar bags is easier when you understand the basics. From selecting the right material to sealing and branding the final pouch. Bags are popular because they are durable, lightweight, and great at protecting products from moisture, oxygen, and light. Ready to see what goes into making them? Let’s find out!
Understanding Mylar Material And Its Benefits
Before you begin, it helps to understand why this mylar packaging material is so trusted. It is widely used in foil barrier bags and laminated packaging films because it supports food-grade packaging with strong moisture barrier packaging and reliable oxygen barrier packaging. This combination improves product freshness protection and supports shelf life extension, making it a smart option for snack packaging, cosmetic product packaging, and other sensitive products.
Materials Needed To Make Custom Mylar Bags
To make your own custom bags successfully, you need the right tools and supplies. The basics include Mylar sheets or rolls, a heat sealer for heat-seal packaging, scissors or a rotary cutter, a ruler or measuring tape, optional add-ons like zippers if you want ziplock mylar bags, and tools for logo printing. Having the right setup makes the process smoother.
Let’s dive into Printed Mylar Bags and reveal the top features that give packaging a more amazing look.
Choosing The Right Size And Shape For Your Bags
The bag should fit the product well without leaving too much empty space or becoming overfilled. Popular options include stand-up pouch packaging for better shelf display, flat pouches for smaller items, and larger styles often used for coffee packaging bags or herbal product packaging. Your choice depends on the type of product, storage needs, shipping method, and overall packaging design.
Step-By-Step Process To Make Bags
Making your own bags is easier when you break the process into clear steps. The work includes choosing the material, cutting it properly, shaping the pouch, sealing it, branding it, and testing it before use.
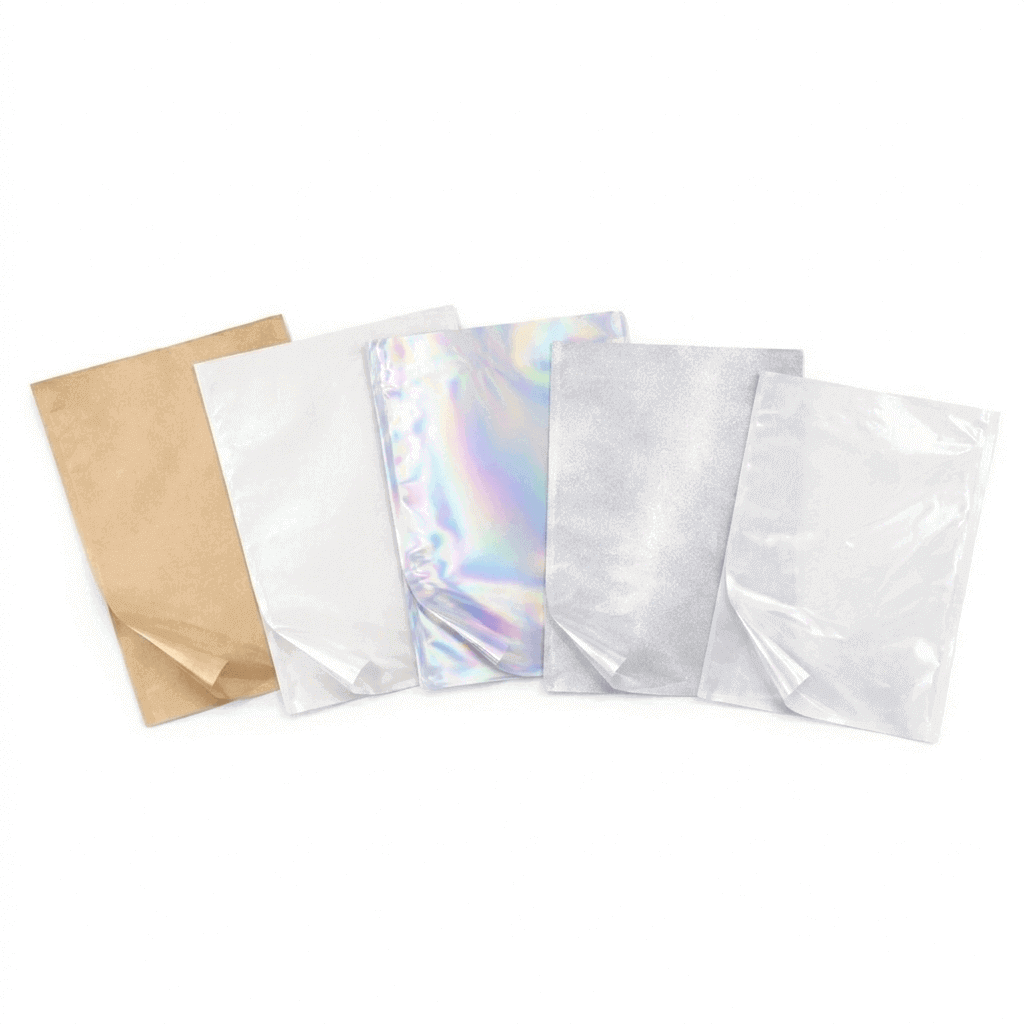
Choosing the Right Mylar Material
How to make your own custom Mylar bags starts with choosing the right thickness and finish. For lightweight items, a 3 mil Mylar film usually works well. For heavier products or long-term storage, 5 mil film offers more durability. You can also choose between glossy and matte finishes depending on the look you want.
"Packaging can be theater, it can create a story." — Steve Jobs
Precise Cutting of Mylar Sheets
After selecting the material, cut it to the required size. Use a ruler or measuring tape for accuracy. Scissors are fine for small runs, but a rotary cutter gives cleaner lines for multiple bags. Leave extra space at the top for sealing. Clean, even cuts make the final bag look better.
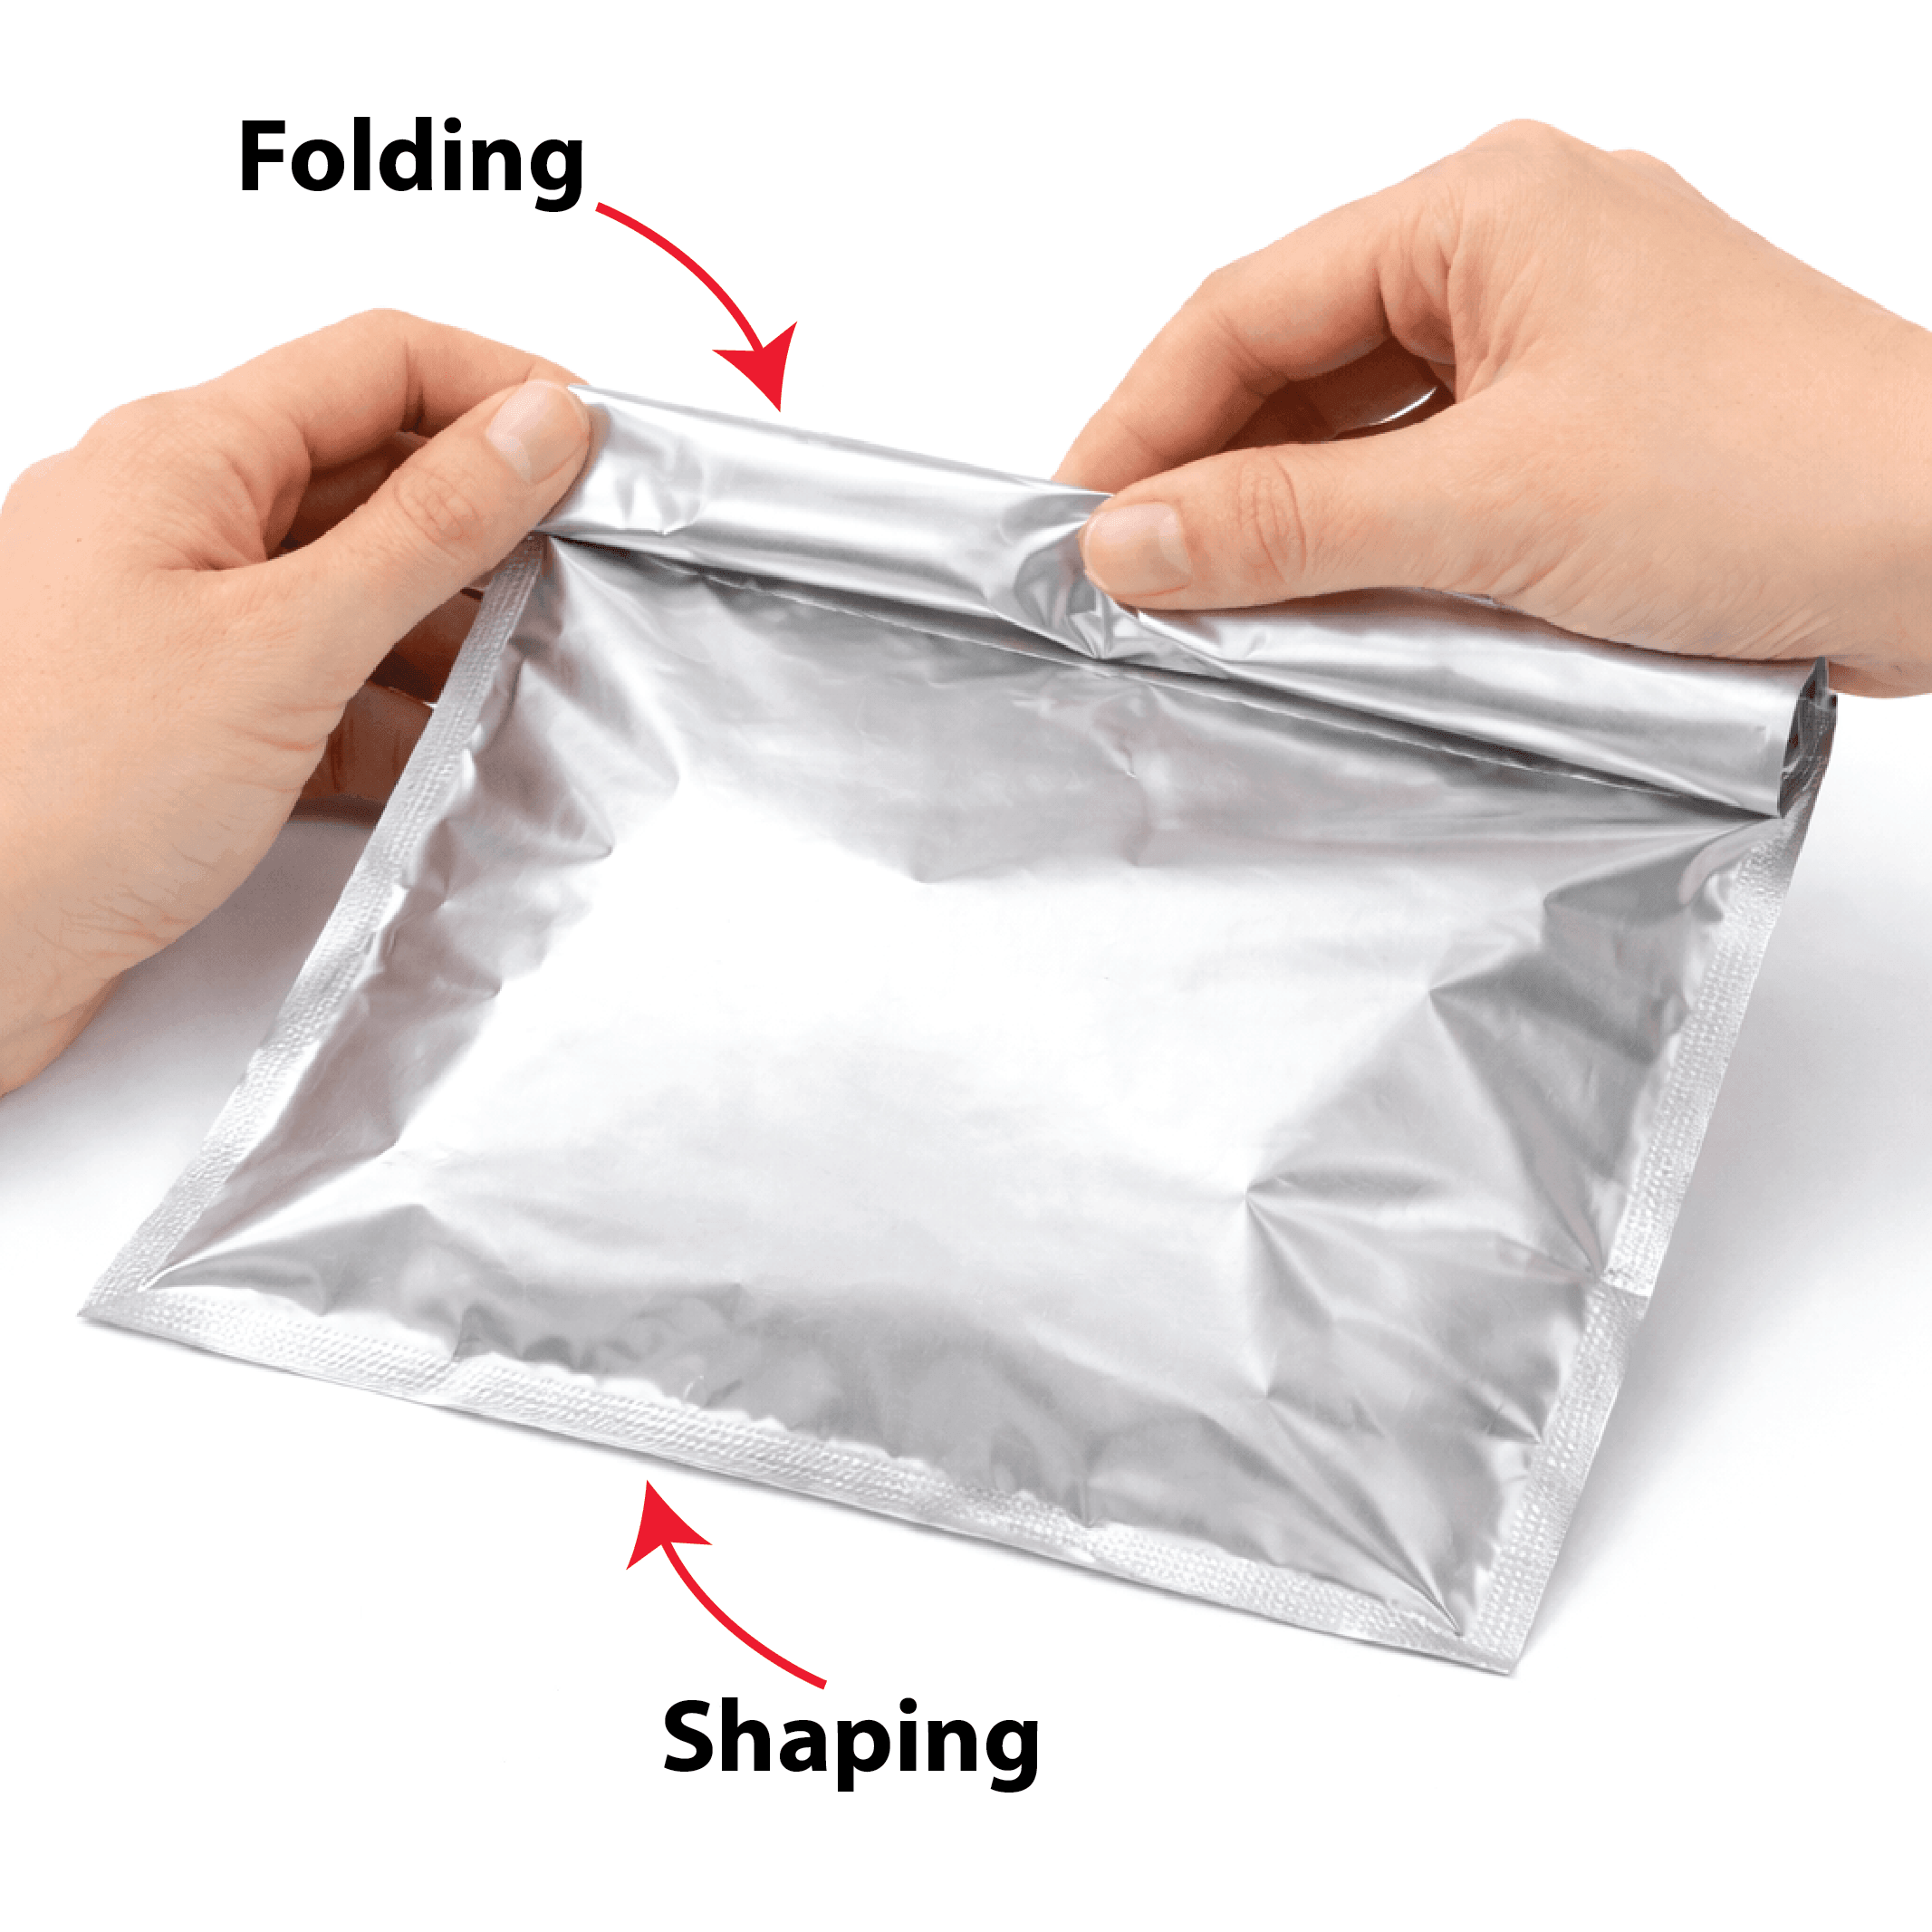
Folding and Shaping the Bag
Folding the material into the right shape is an important step. For a basic pouch, fold it in half and line up the edges. For a more stable design, create folds at the bottom or sides. Neat folds help the bag hold its shape and create a more polished finish.
Adding Branding and Custom Design
How to make your own custom Mylar bags stand out comes down to branding. You can use custom printing directly on the surface or apply stickers and labels for smaller runs. Keep the design clear and away from the sealing area.
Heat Sealing for Airtight Closure
Sealing is one of the most important steps. Use a heat sealer to close the edges securely. Test the heat level on a scrap piece first, because too much heat can damage the film, while too little can create weak seals.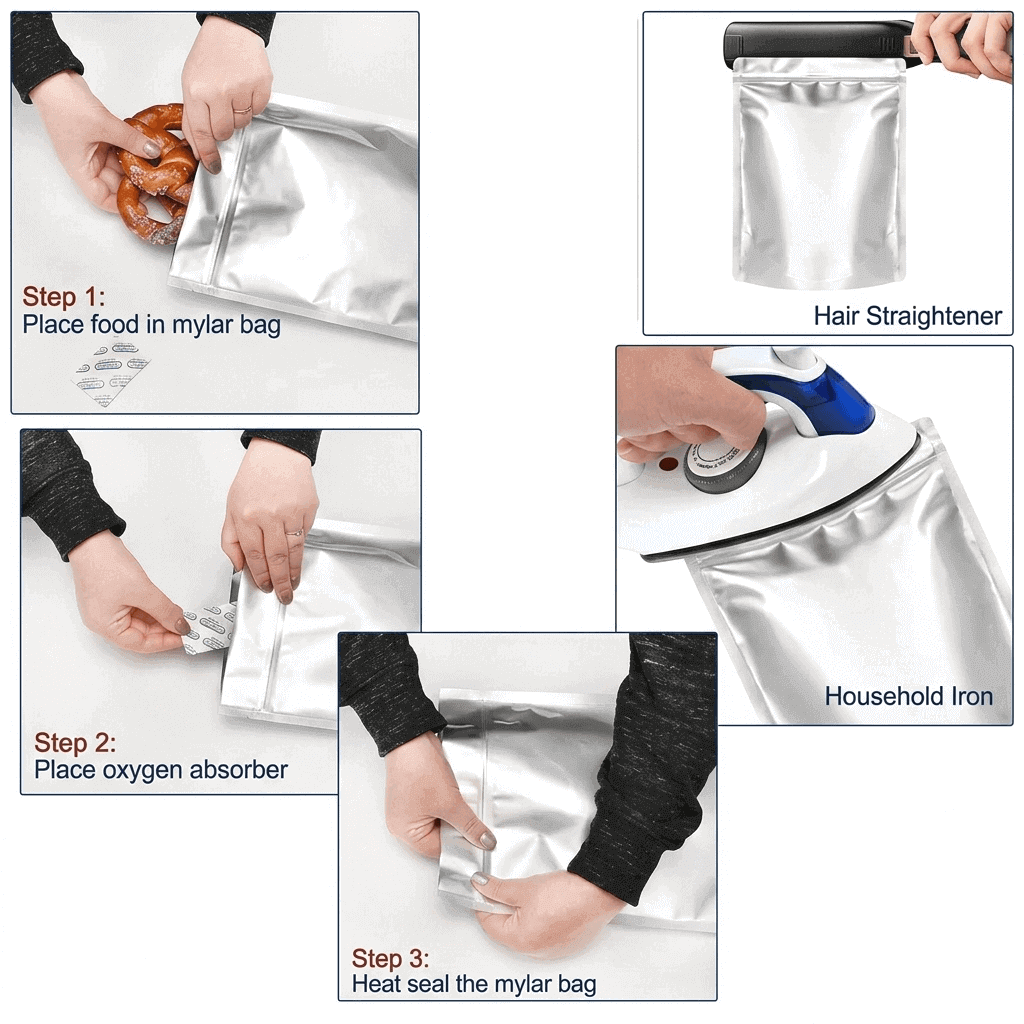
Quality Testing and Durability Checks
Before full production, test the bag carefully. Check the edges, press the bag gently, and if possible, fill it with the real product to confirm its shape and strength. This step helps you catch problems early, whether they come from poor sealing, wrong sizing, or weak material.
Mistakes To Avoid When Making Mylar Bags
A few common mistakes can lower the quality of your packaging:
Using cheap or unsuitable material
Poor heat sealing
Choosing the wrong size
Overcrowded designs or unclear labels
Ignoring food safety or packaging compliance
Avoiding these mistakes helps you create bags that are both attractive and reliable.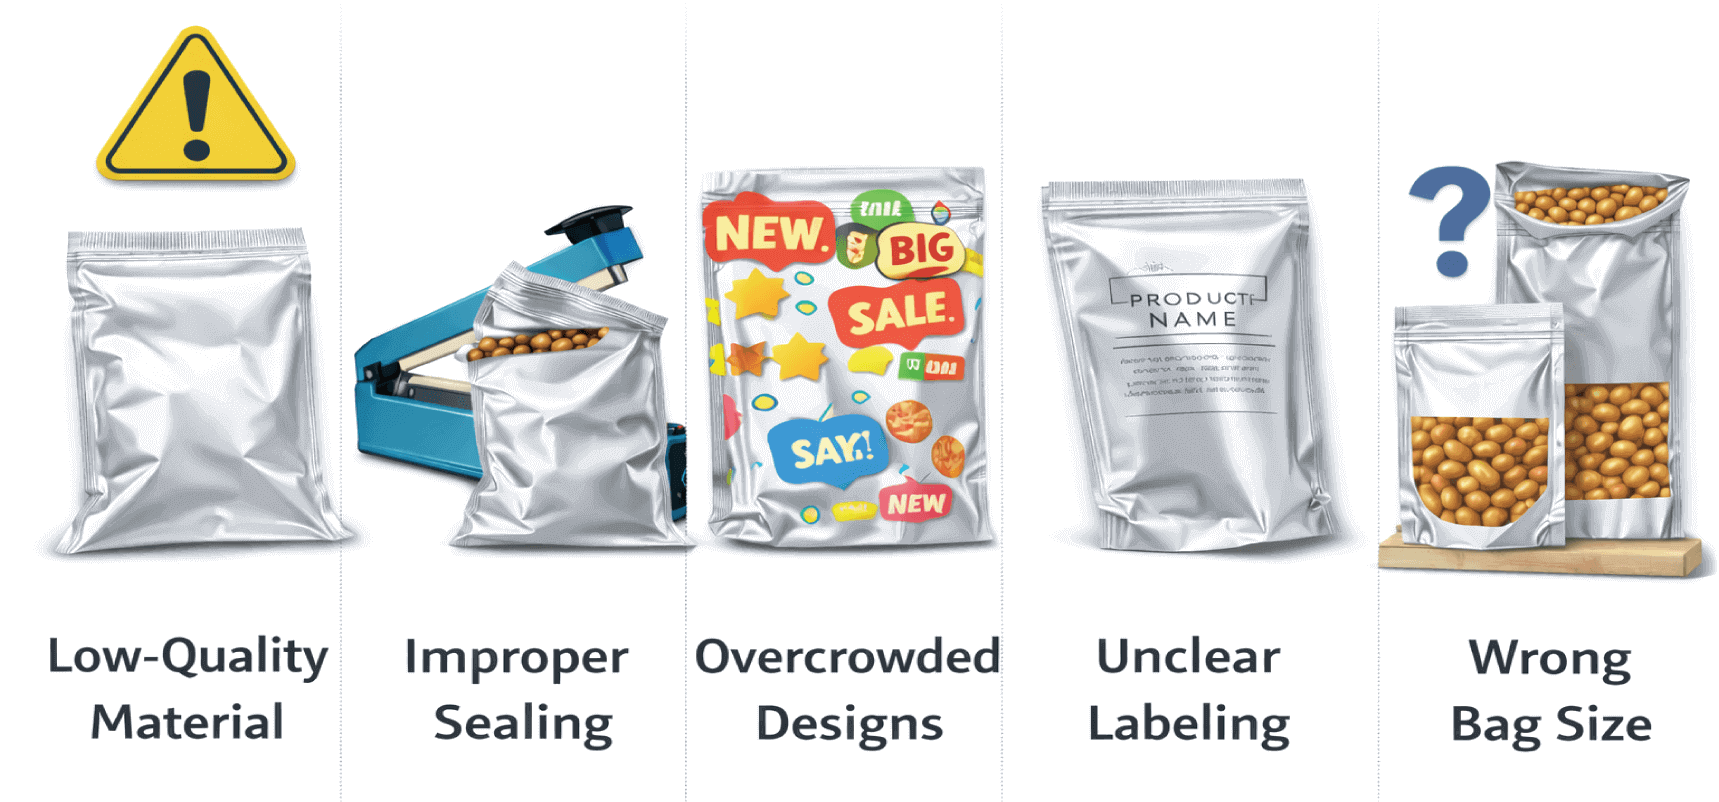
Conclusion
Now you know the basics of how to make your own custom Mylar bags, from material selection to final quality checks. With the right tools, careful measurements, strong sealing, and smart branding, and with expert support from Printing Shell, you can create packaging that looks professional and protects your products effectively. Whether you are a beginner or growing a brand, this process can help you produce custom packaging that is attractive, and dependable.
FAQs
1. What are custom Mylar bags used for?
Custom Mylar bags are commonly used for packaging food, supplements, cosmetics, herbs, powders, and small retail items. They help protect products while also improving branding and presentation.
2. What is Mylar made from?
Mylar is a type of stretched polyester film known for its strength, flexibility, and protective barrier properties. It is widely used in packaging because it helps block moisture, oxygen, and light.
3. Are Mylar bags good for long-term storage?
Yes, Mylar bags are often used for long-term storage because they help preserve product quality. Their barrier protection can keep contents fresh for extended periods when sealed properly.
4. Can I make Mylar bags at home?
Yes, you can make simple custom Mylar bags at home with the right materials and tools. A heat sealer, cutting tools, and quality Mylar film are usually enough to get started.
5. What tools do I need to make custom Mylar bags?
You typically need Mylar sheets or rolls, scissors or a rotary cutter, a ruler, and a heat sealer. Optional tools include labels, zippers, and design supplies.